How to Install a Domestic 5KW Solar Roof Top Inverter
Solar power is increasingly becoming a popular and sustainable source of energy for homes around the world. The ability to harness the sun’s energy not only helps to reduce electricity bills but also contributes to a cleaner, greener planet. One of the most critical components of a home solar system is the solar inverter, which converts the DC power generated by solar panels into usable AC power. In this blog, we will walk you through the steps to install a domestic 5KW solar rooftop inverter.

Before You Begin: Understanding the Components
Before diving into the installation process, it’s essential to understand the major components involved in a 5KW solar rooftop system:
Solar Panels: These are responsible for capturing sunlight and converting it into direct current (DC) electricity. A typical 5KW system may have 12-20 solar panels, depending on their wattage (e.g., 250-400W per panel).
Solar Inverter: This device converts the DC power generated by the panels into alternating current (AC), which is used by household appliances.
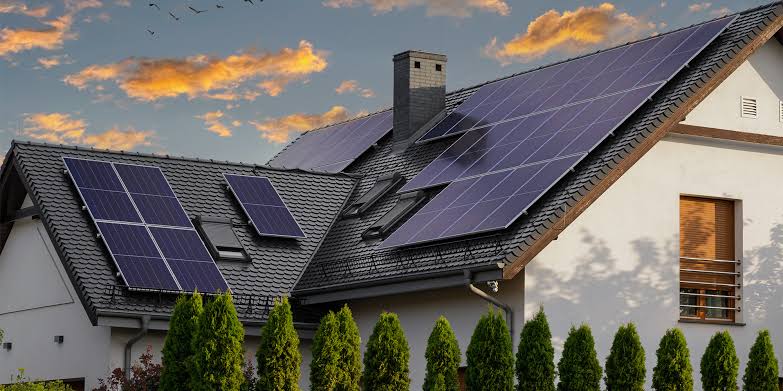
Mounting System: Solar panels need to be securely mounted on your rooftop. A good mounting system is essential for ensuring that the panels remain stable and secure under various weather conditions.
Wiring and Electrical Components: The system will require wiring to connect the panels, inverter, and other components. Additionally, components such as circuit breakers, junction boxes, and earthing systems are necessary for safety.
Battery (Optional): Some systems include a battery for storing excess energy generated during the day for use at night. This is optional for a 5KW system, as many homeowners prefer to feed the excess energy back to the grid.
Step-by-Step Guide to Installing a 5KW Solar Roof Top Inverter
Step 1: Plan and Prepare
Site Assessment: Before you install your solar inverter and panels, conduct a thorough assessment of your rooftop. The location should have:
1.Minimal shading throughout the day (ideally, a south-facing roof in the northern hemisphere or north-facing in the southern hemisphere).
2.A sturdy roof capable of supporting the weight of the solar panels and mounting system.
3.Adequate space for the required number of panels.
Design the System: For a 5KW system, it’s crucial to ensure that the inverter you choose matches the capacity of the panels. A 5KW system typically requires an inverter with a similar capacity, such as a 5kW string inverter, which can handle the output from the solar panels. Choose an inverter from a reliable brand with a good warranty, as this is a long-term investment.
Additionally, ensure that the wiring is correctly sized to handle the output of the system, and that your electrical panel has the capacity to integrate the new solar power system.
Check Local Regulations: Before installing, check local regulations and acquire the necessary permits for installing solar systems. Some areas may require inspections or approvals, especially if you’re connecting to the grid. You’ll need to ensure that your installation complies with local electrical codes and safety standards.
Step 2: Install the Solar Panels
Install the Mounting System: The first step in mounting solar panels is to install the racking system, which holds the panels in place. Ensure that the mounting rails are securely fastened to the roof with the proper anchor bolts. The racking system should be installed at a slight angle to optimize sunlight absorption.
Position the Panels: Once the mounting system is in place, position the solar panels onto the rails. Secure them according to the manufacturer’s guidelines, ensuring that they are tightly fastened and properly aligned.
Wiring the Panels: Connect the solar panels in series (or parallel, depending on the system design) using the appropriate wiring. In a series connection, the voltage is increased, whereas in a parallel connection, the current increases. Ensure all connections are tight and insulated to avoid any electrical hazards.
Connect the Combiner Box: If your system has multiple strings of panels, the wiring from each string will be routed to a combiner box. This box combines the outputs from the different strings of panels and sends the combined output to the inverter.
Step 3: Install the Solar Inverter
Location Selection: Choose an appropriate location for your inverter. It should be easily accessible for maintenance and ideally be placed in a cool, shaded area. Inverters generate heat, so installing them in a location with good ventilation is crucial for their efficient operation.
Mount the Inverter: Once the location is chosen, mount the inverter securely on the wall. It is essential to ensure that the inverter is level, as this will help prevent damage over time.
Electrical Connections:
DC Input: Connect the DC cables from the combiner box or directly from the panels to the inverter’s DC input terminals. Ensure that the polarity is correct: the positive terminal on the panel should connect to the positive terminal on the inverter and vice versa.
AC Output: Connect the AC output terminals of the inverter to the circuit breaker panel. This will allow the power to be distributed throughout your home. You should connect the inverter to a dedicated breaker to ensure safe operation.
Grounding: Proper grounding is essential for the safety of your system. Ensure that the inverter and all components are grounded according to the manufacturer’s instructions and local electrical codes.
Inverter Settings: Many modern inverters come with display screens or mobile app controls. After installation, configure the inverter settings to ensure optimal performance. Set the correct country-specific parameters such as voltage range, grid frequency, and maximum output power.
Step 4: Connect the System to the Grid (If Applicable)
If you’re planning to feed excess electricity back into the grid (net metering), you will need to connect your system to the grid. This step involves:
Installing a Bi-directional Meter: The utility company will usually install a bi-directional meter, which records both the energy consumed from the grid and the energy supplied back to the grid.
Grid Inspection: Before you connect the inverter to the grid, an inspection by your local electrical utility may be required to ensure that your system complies with their requirements.
Step 5: Testing and Commissioning the System
Power On the System: Once all electrical connections are made, power on the inverter. It will perform a self-check and display the system’s status.
Check the Output: Use the inverter’s display or a mobile app to monitor the output of the system. Verify that the system is generating power and that the inverter is functioning correctly. For a 5KW system, the inverter should be producing around 5KW of AC power under optimal conditions.
Check the Grid Connection: If your system is grid-connected, ensure that the energy is being fed back into the grid. This can be monitored via the bi-directional meter.
System Performance Check: Check the overall performance of the system, including voltage, current, and efficiency. If everything is functioning correctly, your system should be generating clean, usable power.
Step 6: Monitor and Maintain Your Solar System
Ongoing Monitoring: Many modern solar inverters come with monitoring capabilities that allow you to track the system’s performance through mobile apps or online portals. This is essential for ensuring your system is working optimally and detecting any issues early on.
Periodic Maintenance: Regular maintenance is necessary to keep your system in good working condition. This includes cleaning the solar panels, checking for any wiring damage, and performing annual inspections of the inverter and other electrical components.
Troubleshooting: If you notice that your system isn’t performing as expected, it’s important to troubleshoot potential issues. Check for shading on the panels, damaged wiring, or inverter faults. If you’re unsure, it’s best to consult a professional.
Conclusion
Installing a 5KW solar rooftop inverter is a rewarding yet detailed process that requires careful planning and execution. By following these steps, you can harness the power of the sun and reduce your dependency on the grid. Whether you’re looking to cut down on electricity costs or contribute to a more sustainable future, a solar energy system can be a fantastic investment for your home.
However, solar system installation involves both electrical and structural work, so if you’re not comfortable with DIY electrical projects, it’s advisable to hire a certified professional. Proper installation ensures that your system works efficiently and safely for years to come.